
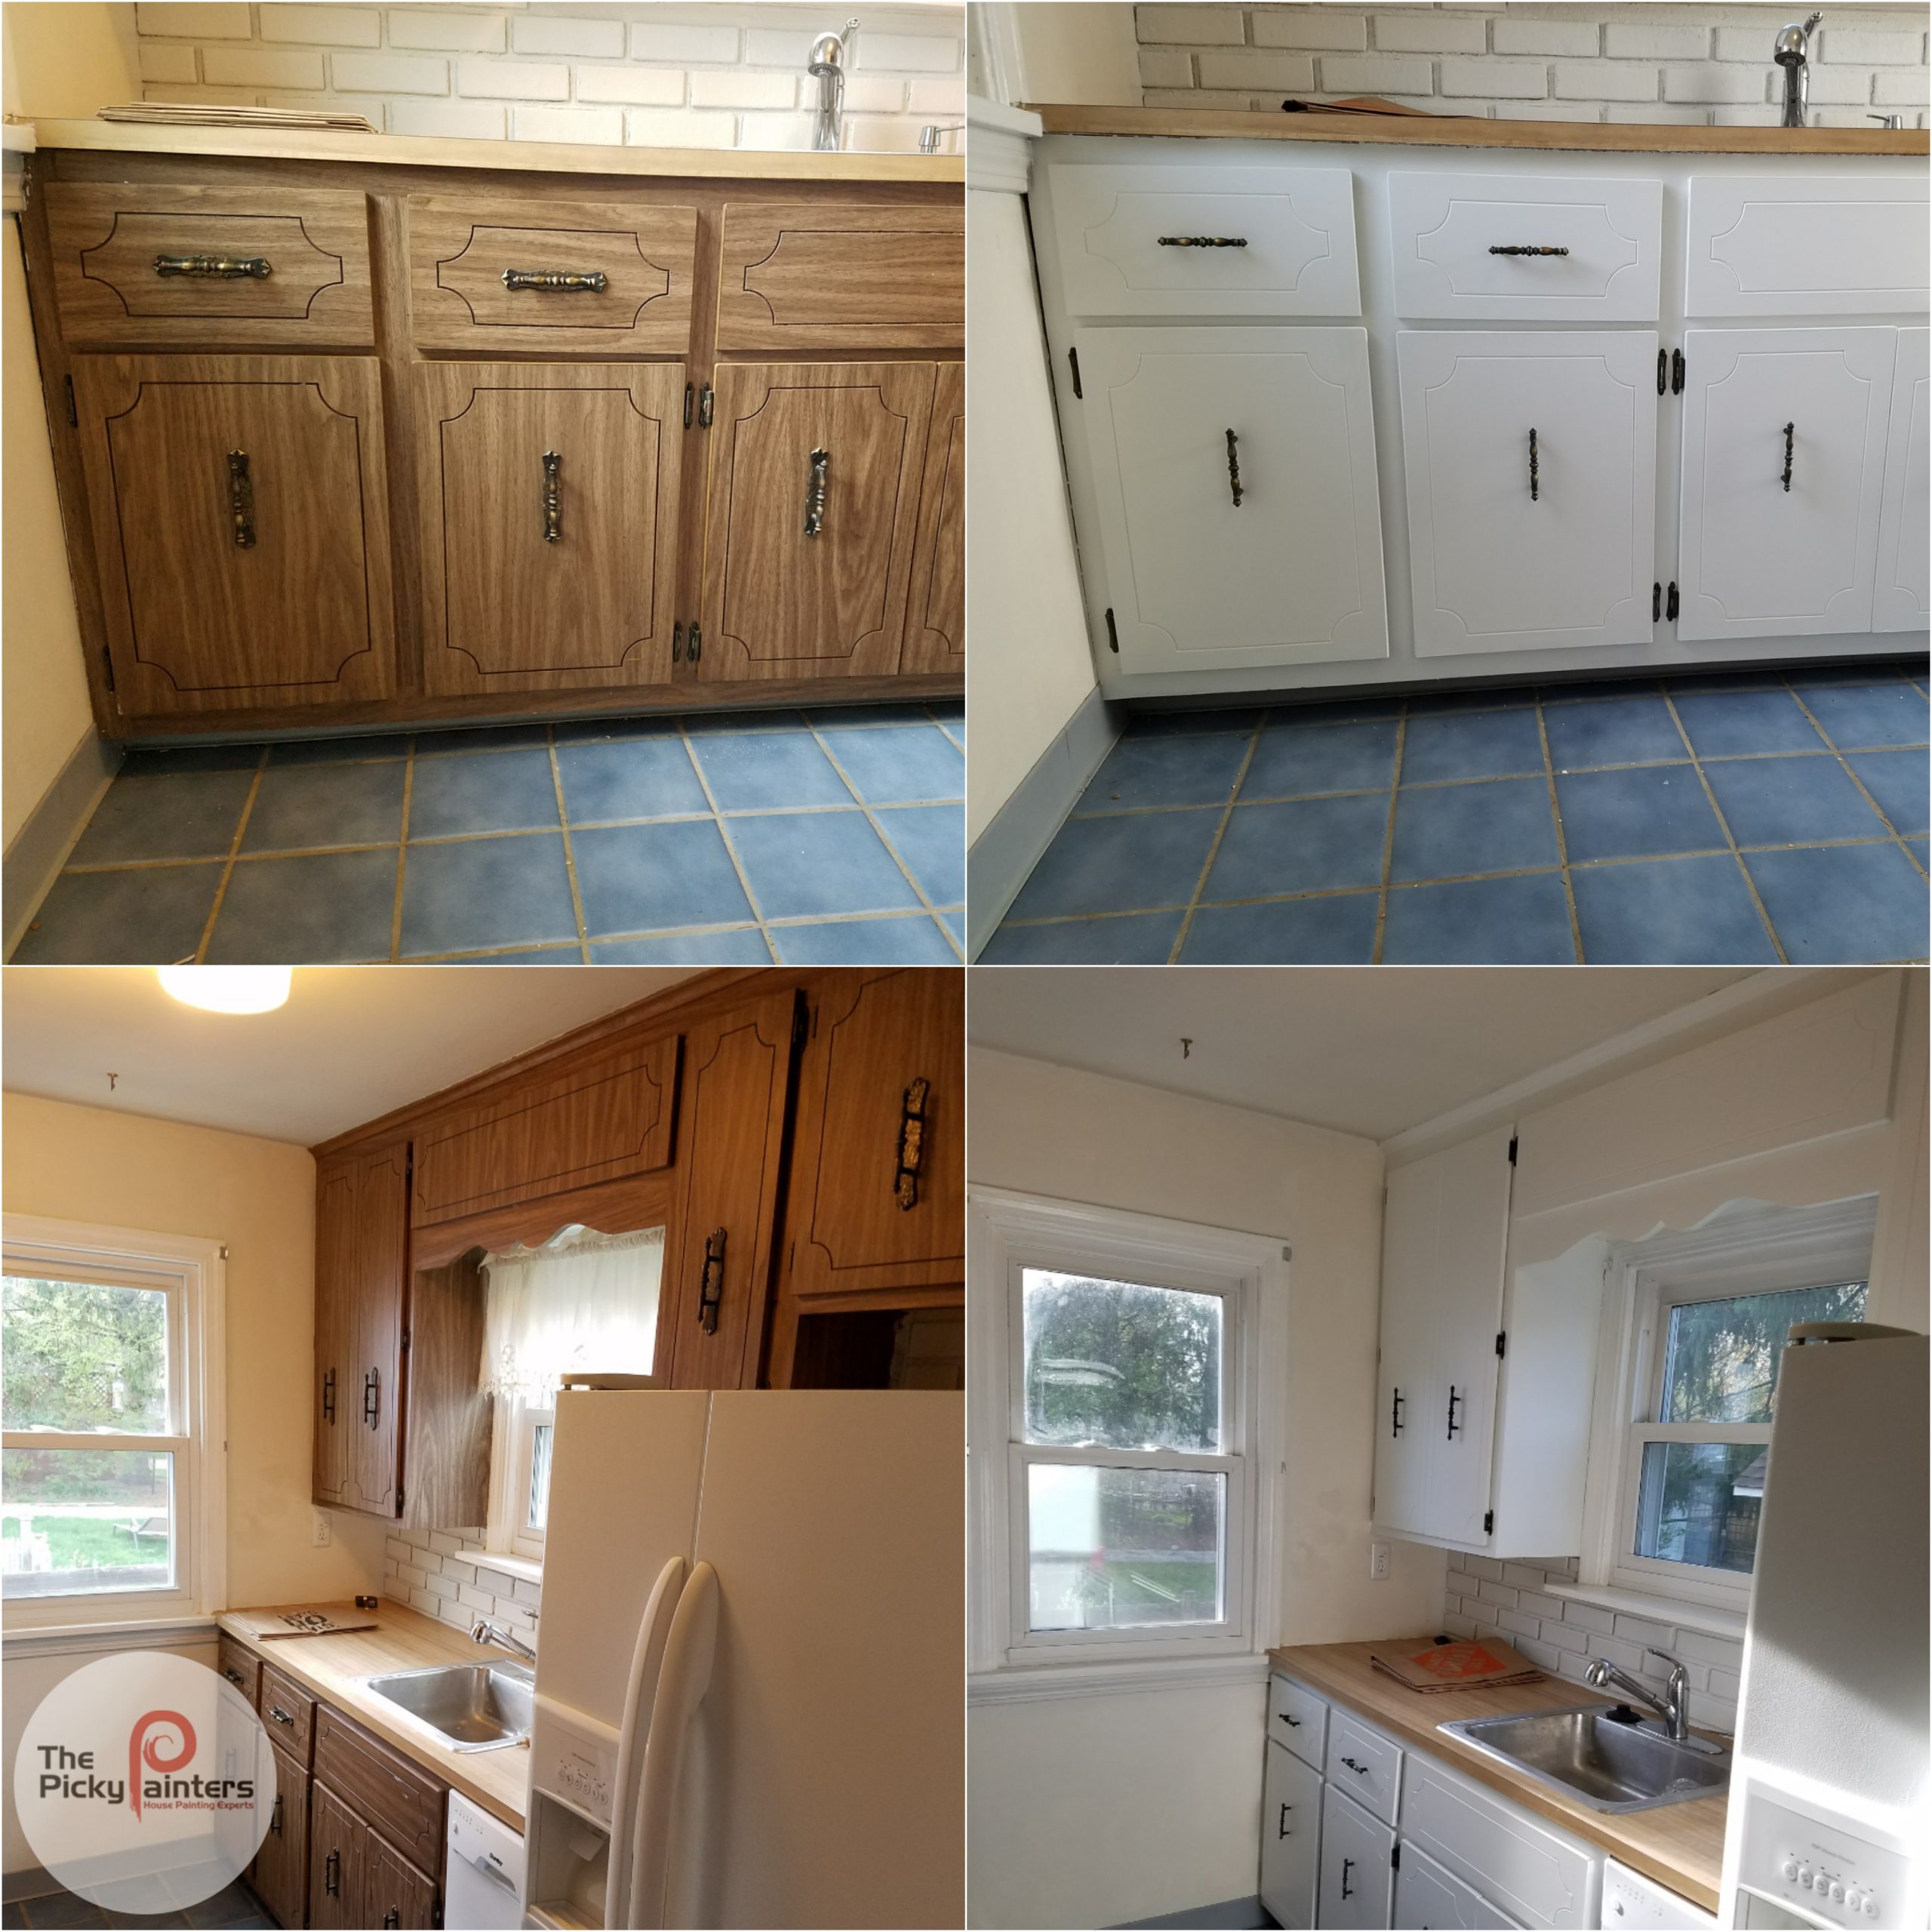
How To Paint Laminate Kitchen Cabinets Without Sanding

Learn our expert techniques for painting laminate cabinets flawlessly, achieving a professional-looking finish without the tedious prep work. Discover the best paints, primers, and tools for a stunning update.
Keywords: paint laminate cabinets, paint laminate cabinets without sanding, painting kitchen cabinets, refinishing laminate cabinets, no-sand paint for cabinets, best paint for laminate cabinets, how to paint laminate cabinets, kitchen cabinet makeover, diy kitchen renovation, painting kitchen cabinets without sanding, primer for laminate cabinets, best primer for laminate cabinets, how to prep laminate cabinets for painting, deglosser for laminate cabinets, laminate cabinet painting techniques, durable cabinet paint, cabinet painting tips, transforming kitchen cabinets, budget kitchen renovation, kitchen update, easy kitchen makeover
Introduction:
Are you dreaming of a fresh, updated kitchen but dreading the arduous task of sanding your laminate cabinets? The thought of hours spent sanding, followed by dust everywhere, is enough to deter even the most enthusiastic DIYer. The good news is: you don’t have to sand! This comprehensive guide provides a step-by-step process for painting laminate kitchen cabinets without sanding, achieving a stunning, durable finish that will transform your kitchen’s aesthetic without the back-breaking work. We’ll explore the best products, techniques, and tips to ensure a professional-looking result, even for beginners.
Table of Content
Why Choose to Paint Laminate Cabinets Without Sanding?
Sanding laminate cabinets is not only time-consuming and messy, but it also carries the risk of damaging the cabinet surfaces. Laminate is a relatively hard surface, and aggressive sanding can easily scratch or gouge it, leading to an uneven finish and requiring extensive repairs. Painting without sanding offers several advantages:
- Farmhouse Kitchen Cabinet Hardware Ideas Under $50
- white cabinets with black island
- Dark Brown Cabinets with White Countertops: A Timeless and Elegant Choice
- handles for oak cabinets
- Blue Cabinets with Black Hardware: A Timeless Trend for Modern Kitchens
- Time Savings: Eliminating the sanding process significantly reduces the overall project time, allowing you to enjoy your updated kitchen sooner.
- Less Mess: Sanding creates a considerable amount of dust, requiring extensive cleanup. Skipping this step minimizes mess and keeps your home cleaner.
- Reduced Risk of Damage: Avoids the risk of scratching or damaging the laminate surface during sanding.
- Easier for Beginners: The no-sand approach simplifies the process, making it more accessible to DIYers of all skill levels.
Related Article How to paint laminate kitchen cabinets without sanding

Choosing the Right Paint and Primer:
Selecting the appropriate paint and primer is crucial for a successful paint job on laminate cabinets. Not all paints and primers are created equal, and using the wrong products can lead to peeling, chipping, or a lack of adhesion.

Primer: A high-quality bonding primer designed for laminate surfaces is essential. Look for primers specifically formulated for glossy surfaces or those that explicitly state "no-sand" capability. These primers provide superior adhesion to the laminate, creating a smooth base for the topcoat. Consider a stain-blocking primer if your laminate has any discoloration.
-
Paint: Choose a durable, high-quality paint designed for cabinets and trim. Acrylic-alkyd hybrid paints offer excellent durability, chip resistance, and a smooth finish. Consider a paint specifically formulated for kitchen cabinets, as these are designed to withstand moisture, grease, and frequent cleaning. Semi-gloss or satin finishes are popular choices for kitchen cabinets as they are easy to clean and maintain.
Essential Tools and Supplies:
Before you begin, gather the necessary tools and supplies to ensure a smooth and efficient painting process:
- Deglosser: Even without sanding, deglossing the laminate surface is crucial to improve paint adhesion. A liquid deglosser is easier to use than sanding and will effectively remove the gloss from your cabinets.
- Tack Cloth: Used to remove dust and debris after deglossing and before priming.
- Paintbrushes: High-quality brushes, both angled and straight, are recommended for achieving a smooth, even finish. Consider using a foam roller for larger surfaces for quicker application.
- Paint Tray: A deep paint tray is ideal for holding enough paint and minimizing spills.
- Painter’s Tape: High-quality painter’s tape is essential for protecting areas you don’t want to paint, such as hardware, countertops, and walls.
- Drop Cloths: Protect your floors and countertops from paint splatters.
- Putty Knife: For filling any minor imperfections or gaps in the laminate.
- Safety Glasses and Mask: Protect your eyes and lungs from paint fumes and dust.
- Gloves: Protect your hands from paint and chemicals.
- Screwdrivers: For removing cabinet hardware.
- Cleaning Supplies: For cleaning the cabinets before starting and after finishing.

Step-by-Step Guide to Painting Laminate Cabinets Without Sanding:
-
Preparation is Key: Thoroughly clean the cabinet surfaces with a degreaser to remove any grease, grime, or sticky residue. Allow them to dry completely.
-
Remove Hardware: Remove all cabinet knobs, handles, and hinges. Label them carefully to ensure easy reinstallation.
-
Deglossing the Cabinets: Apply a high-quality deglosser according to the manufacturer’s instructions. This will roughen the surface slightly, improving paint adhesion. Allow it to dry completely, usually 30 minutes to an hour, then wipe off any residue.
-
Caulk and Fill Imperfections: Use a high-quality paintable caulk to fill any gaps or seams between cabinets or between the cabinets and the walls. Allow the caulk to dry completely.
-
Priming the Cabinets: Apply a bonding primer specifically designed for laminate surfaces. Use a high-quality brush or roller, applying thin, even coats. Allow each coat to dry completely before applying the next. Two coats are generally recommended.
-
Painting the Cabinets: Once the primer is dry, apply your chosen cabinet paint. Use the same application technique as with the primer, applying thin, even coats. Allow each coat to dry completely before applying the next. Two to three coats are usually sufficient for full coverage and a smooth finish.
-
Inspect and Re-Coat: Once the final coat is dry, carefully inspect the cabinets for any imperfections. If needed, apply a touch-up coat to any areas that need extra coverage or correction.
-
Reinstall Hardware: Once the paint is completely dry (allow at least 24-48 hours), reinstall the cabinet hardware.
-
Clean Up: Clean up your brushes and rollers immediately after use with appropriate solvents or water, depending on the type of paint and primer used.
Advanced Techniques for a Professional Finish:
-
Wet-on-Wet Technique: For a smoother finish, consider using the wet-on-wet technique. This involves applying the next coat of paint before the previous coat is completely dry. This helps to blend the coats and reduce brush strokes.
-
Back Brushing: To minimize brush strokes, use the back brushing technique. This involves using a second brush to lightly brush over the wet paint in the opposite direction of the initial strokes.
-
Multiple Thin Coats: Applying multiple thin coats is always better than applying one or two thick coats. Thin coats will dry faster and reduce the risk of drips and runs.
-
Using a Sprayer: For a super-smooth finish, consider using an HVLP (high-volume, low-pressure) sprayer. This requires more preparation and cleanup, but the results are often worth the extra effort.
Troubleshooting Common Problems:
-
Peeling Paint: This usually indicates inadequate surface preparation or the use of an unsuitable primer or paint. Ensure you properly deglossed the surface and used a primer designed for laminate.
-
Uneven Finish: This can be caused by uneven paint application or insufficient drying time between coats. Apply thin, even coats and allow ample drying time between each coat.
-
Brush Strokes: Minimize brush strokes by using high-quality brushes, applying thin coats, and using techniques like back brushing.
-
Chipping: This can be due to using a paint that isn’t durable enough or insufficient drying time before use. Use a high-quality paint specifically formulated for cabinets and allow ample drying time.
Maintaining Your Newly Painted Cabinets:
To maintain the beauty and durability of your freshly painted laminate cabinets, follow these simple tips:
-
Regular Cleaning: Wipe down your cabinets regularly with a damp cloth to remove dust and grime. Avoid abrasive cleaners or scouring pads.
-
Avoid Harsh Chemicals: Avoid using harsh chemicals or abrasive cleaners that could damage the paint finish.
-
Protect from Moisture: Prevent excessive moisture from damaging the paint by promptly wiping up spills and using coasters under glasses and other items.
Conclusion:
Painting laminate kitchen cabinets without sanding is a feasible and rewarding project that can dramatically transform your kitchen’s look and feel. By following these detailed instructions and employing the right techniques, you can achieve a professional-looking finish that will last for years. Remember, patience and attention to detail are key to a successful outcome. Now go ahead and unleash your inner DIYer and create the kitchen of your dreams!


