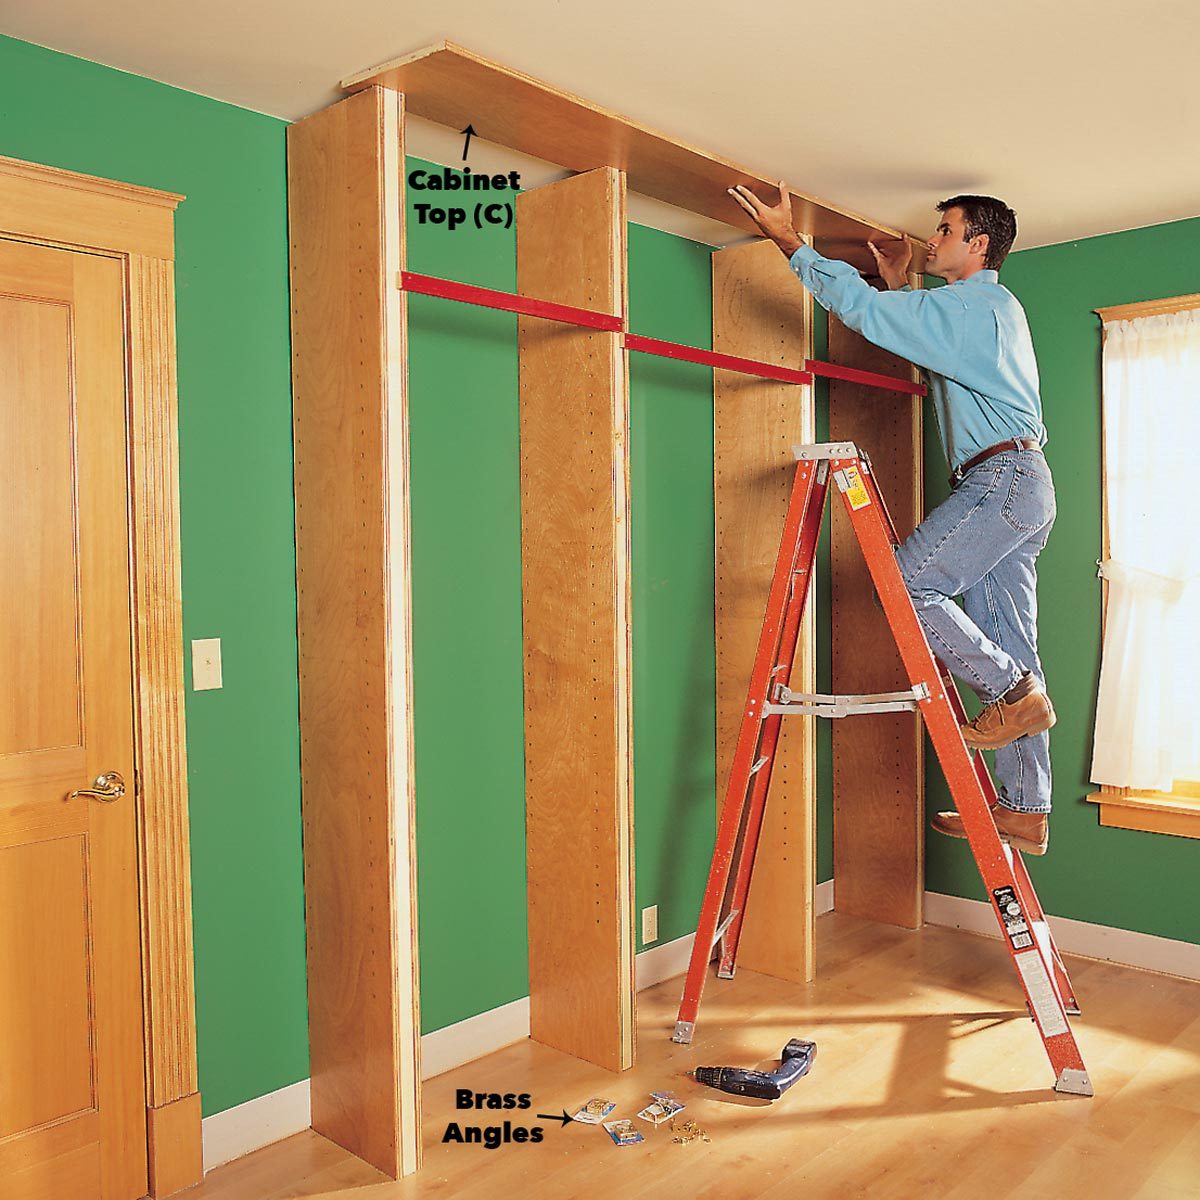
How To Build Floor-to-ceiling Bookcase Cabinets

This comprehensive guide covers design, materials, tools, step-by-step instructions, and finishing techniques for a professional result.
Keywords: floor-to-ceiling bookcase, bookcase cabinets, custom bookcase, built-in bookcase, DIY bookcase, woodworking project, cabinet making, shelving units, storage solutions, home improvement, step-by-step guide, woodworking plans, detailed instructions, finishing techniques
Introduction:
Floor-to-ceiling bookcase cabinets are a statement piece, transforming a room from ordinary to extraordinary. They offer unparalleled storage, showcasing your prized possessions while adding a touch of elegance and sophistication. While seemingly daunting, building your own is achievable with careful planning, the right tools, and a methodical approach. This detailed guide will walk you through every step, from initial design to the final finishing touches, enabling you to create a bespoke storage solution perfectly tailored to your needs and aesthetic preferences.
Table of Content
I. Planning and Design:
Before you even pick up a saw, meticulous planning is crucial. This phase dictates the success of your project.
A. Measuring and Assessing the Space:
Related Article How to build floor-to-ceiling bookcase cabinets
- Oak Cabinets with Black Hardware: A Perfect Combination for Your Kitchen
- dark cabinets light floor
- Farmhouse Kitchen Cabinet Hardware Ideas Under $50
- Dark Cabinets with White Appliances: A Perfect Combination for Your Kitchen
- White Cabinets Blue Backsplash: A Perfect Match for Your Kitchen
-
Accurate Measurements: Begin by meticulously measuring the space where your bookcase will reside. Note the height, width, and depth, accounting for any irregularities in the walls or floor. Measure multiple times to ensure accuracy. Slight inaccuracies can lead to significant problems later.
-
Doorway and Window Considerations: Consider the proximity of doorways and windows. Will your bookcase need to work around existing features? Plan accordingly, incorporating these elements into your design.
-
Wall Structure: Determine the wall’s composition (studs, drywall, brick, etc.). This influences your anchoring and support strategies. Locate wall studs to ensure secure mounting. A stud finder is an invaluable tool here.

-
Desired Functionality: Consider how you’ll use the bookcase. Do you need adjustable shelves? Drawers? Hidden compartments? Incorporate these features into your design early on.


B. Sketching and Design Software:
-
Hand-Drawn Sketches: Start with rough sketches to visualize the overall design, including shelf placement, dimensions, and any special features.

-
Digital Design Software: For a more precise approach, utilize design software like SketchUp or AutoCAD. These programs allow for detailed 3D modeling, ensuring accurate measurements and visualizing the final product before construction.
-
Shelf Spacing: Determine optimal shelf spacing based on the types of items you’ll store. Consider books, decorative items, and other objects, ensuring adequate space for each. Adjustable shelving offers maximum flexibility.
C. Material Selection:
-
Wood Type: Choose a wood species that suits your aesthetic and budget. Popular choices include pine (affordable), oak (durable), maple (hard and smooth), and cherry (rich color). Consider the wood’s weight and strength for taller units.
-
Plywood: Plywood is a cost-effective and stable option for shelves and cabinet sides. Use high-quality plywood for durability.
-
Hardware: Select sturdy hinges, drawer slides, and shelf supports. High-quality hardware ensures smooth operation and longevity. Consider the style of your hardware to complement your overall design.
-
Finishing Materials: Choose a finish that protects the wood and complements your décor. Options include paint, stain, varnish, or lacquer.
II. Tools and Materials List:
Before you begin, gather all necessary tools and materials. Having everything readily available will streamline the process.
(Detailed list will vary based on design, but should include):
- Measuring Tape: Essential for accurate measurements.
- Level: Ensures shelves and cabinets are perfectly level.
- Stud Finder: Locates wall studs for secure mounting.
- Circular Saw or Miter Saw: For cutting wood to size.
- Jigsaw: For intricate cuts and curves.
- Drill: For drilling pilot holes and assembling components.
- Screwdriver (various bits): For securing screws.
- Clamps: To hold pieces together during assembly.
- Safety Glasses and Ear Protection: Crucial for protecting your eyes and ears.
- Wood Glue: For strong and durable joints.
- Wood Screws: Appropriate size and type for your wood.
- Sandpaper (various grits): For smoothing surfaces.
- Wood Filler: To fill any gaps or imperfections.
- Primer: Prepares the wood for painting or staining.
- Paint or Stain: Your chosen finish.
- Polyurethane or Lacquer: For protection and durability.
- Cabinet Hinges: If incorporating doors.
- Drawer Slides: If incorporating drawers.
- Shelf Supports: Adjustable or fixed, depending on your design.
- Wood: Chosen species and dimensions according to your plan.
- Plywood: For shelves and cabinet sides.
III. Construction Process:
This section details the step-by-step construction, assuming a basic floor-to-ceiling bookcase with adjustable shelves. Adapt as needed for your specific design.
A. Cutting the Wood:
-
Precise Cuts: Carefully cut all wood pieces to the dimensions specified in your plans. Use a miter saw for accurate angles and a circular saw for straight cuts. Double-check measurements before each cut.
-
Accurate Angles: Ensure all angles are precise, especially for corner joints. Inaccurate cuts will result in a wobbly or unstable structure.
-
Smooth Edges: Sand all cut edges to remove any splinters or roughness.
B. Assembling the Frame:
-
Corner Joints: Use strong corner joints, such as pocket hole joinery or dowel joints, for a sturdy frame. Apply wood glue and secure with screws.
-
Vertical Supports: Add vertical supports at regular intervals for added strength, especially for taller units.
-
Leveling: Regularly check for levelness throughout assembly. Adjust as needed to ensure a straight and stable structure.
C. Installing Shelves:
-
Adjustable Shelves: Use shelf supports that allow for adjustable shelving. This provides flexibility in arranging your items.
-
Fixed Shelves: For fixed shelves, ensure they are securely attached to the frame using screws and glue.
-
Spacing: Maintain consistent spacing between shelves based on your design.
D. Attaching to the Wall:
-
Secure Mounting: Securely attach the bookcase to the wall studs using heavy-duty anchors and screws. This is crucial for stability and safety, especially with floor-to-ceiling units.
-
Wall Anchors: Use appropriate wall anchors for the type of wall material.
-
Weight Distribution: Distribute the weight evenly across multiple studs for maximum stability.
E. Finishing Touches:
-
Sanding: Thoroughly sand all surfaces to achieve a smooth finish. Use progressively finer grits of sandpaper.
-
Filling Gaps: Fill any gaps or imperfections with wood filler, allowing it to dry completely before sanding smooth.
-
Priming: Apply a primer to prepare the wood for the final finish.
-
Painting or Staining: Apply your chosen finish (paint or stain) according to the manufacturer’s instructions. Apply multiple coats for optimal coverage and protection.
-
Sealing: Apply a clear sealant (polyurethane or lacquer) to protect the finish and enhance durability.
IV. Advanced Techniques and Customization:
This section explores advanced techniques to elevate your bookcase project.
A. Incorporating Doors and Drawers:
-
Door Installation: Install doors using high-quality hinges. Ensure proper alignment and smooth operation.
-
Drawer Installation: Install drawers using sturdy drawer slides. Ensure smooth gliding and proper alignment.
B. Adding Decorative Elements:
-
Molding and Trim: Add molding and trim to enhance the aesthetic appeal and create a more finished look.
-
Crown Molding: Crown molding at the top adds a touch of elegance.
-
Baseboard: Baseboard at the bottom provides a clean and finished look.
C. Lighting Integration:
-
LED Strip Lighting: Integrate LED strip lighting to highlight your books and decorative items.
-
Recessed Lighting: Recessed lighting provides a more sophisticated and even illumination.
V. Troubleshooting and Tips:
- Uneven Walls: Use shims to compensate for uneven walls during assembly.
- Wood Movement: Allow for wood movement by using appropriate joinery techniques and leaving slight gaps.
- Safety First: Always wear safety glasses and ear protection.
- Take Your Time: Rushing the process can lead to mistakes. Take your time and work carefully.
VI. Conclusion:
Building floor-to-ceiling bookcase cabinets is a rewarding project that transforms your space. With careful planning, the right tools, and a methodical approach, you can create a stunning and functional piece of furniture that will be enjoyed for years to come. Remember to prioritize safety and take your time to achieve a professional-looking result. This comprehensive guide provides a solid foundation; however, further research and exploration of woodworking techniques will enhance your skills and enable you to create even more intricate and personalized designs. Don’t be afraid to experiment and personalize your project to reflect your unique style and preferences.


